


I personally believe that eyebrows can make or break your face, and any makeup look you do. My most frequently asked beauty questions are usually about my eyebrow routine so I thought I’d break it down for you guys in a step-by-step guide as to how I achieve these fleeky brows – especially since I naturally have sparse and crazy growing eyebrows. Please bare in mind that I do use quite a few products and tools and steps that you may not require but this is just a guide. Eyebrows are not one size fits all: this is just what works for me. It also helps to regularly have your brows done; I get my eyebrows threaded by a professional every 3-4 weeks. Also bare in mind that I do my eyebrows before the rest of my makeup so I have on absolutely no makeup or photo editing in any of these pictures (i.e. ignore the bags under my eyes and the current state of my skin lol).

These are the tools and products I use for my eyebrows. From L-R: Coastal Scents Concealer Brush, Coastal Scents Angled Liner Brush, ELF Cosmetics Flawless Concealer Brush, a Spoolie, MAC Spiked Eyebrow Pencil, ELF Cosmetics Lash & Brow Gel, Anastasia Beverly Hills Dipbrow Pomade in Dark Brown and LA Girl Pro Conceal HD Concealer in Fawn.
- These are my natural brows (nightmare, I know I know)
- The first thing you want to do is use a spoolie to comb your hairs upward in order to see the lower outline of your eyebrow.
- Using an angled liner brush to apply the Dipbrow, trace the lower outline of the eyebrow, following the natural shape of the brow. Don’t worry too much about it being perfect, we’ll clean it up after.


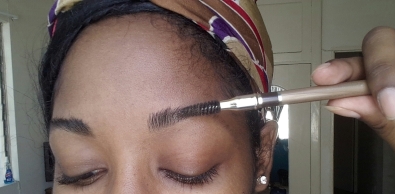
- Next you’re going to take the spoolie again, and brush the hairs down this time. Using the angled brush, outline the top of your brow with the Dipbrow.


- Use whatever product is left on the brush to fill in any sparse spots in your brow and use the spoolie to brush the brows into place and blend the product with your brow hairs.

- Using a brow pencil or a small brush, create a straight line from the corner of your nose to the inner corner of your eye: this is where your eyebrow should begin. If you’re like me and your eyebrows are a little far apart, use the tip of the angled brush to create a few hair-like strokes to bring your brows in a little.

- Using a small concealer brush and starting at the base of the brow, use a concealer a shade or two lighter to clean up the base of the brow and sharpen the top of the brow.


- Using a blending brush, blend out the concealer.

- Use an eyebrow pencil to fill in any sparse spots in the brow.

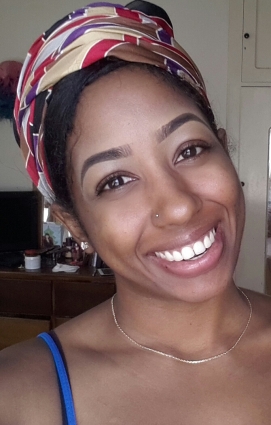
- Set your brows with a clear brow gel and hello fleekiness, how you doinggggg?
Hope you guys enjoyed this post. Comment below if you’d like me to include more step-by-step tutorials like this in the future. Don’t forget to subscribe and follow me on IG at @beatsbytiff_ & @tiffanysamantha_

2 Replies to “Eyebrows on Fuhleeeek – My Eyebrow Routine”